I Love Tissue Paper
If you saw my Discipline collage, you can tell I have a thing for tissue paper. I have used it make inchies and to paint mountain/sunset scenes.
Now I am working on some ATCs. I have done some before using the same cardstock I am using this time. However, I am tired of this background and want to alter it some how, so here's where the process went.
(Note: I did try it on some sample-sized pieces of cardstock first so you might see those pop in from shot to shot.)
I began with a plain piece of cardstock (it is supposed to be green/yellow.)
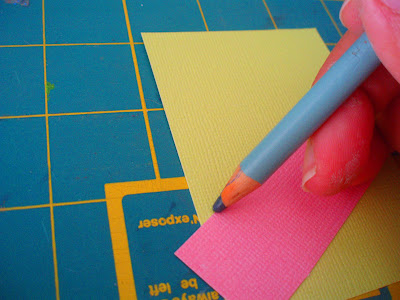
I lightly drew a line on the card.

I then squeezed some glue onto the card (don't ask why it's blue...that's another story.) I used scrap piece of stock to spread the glue to get a perfectly straight edge.
 I laid the tissue paper onto the wet glue and pressed out the bubbles. (You could use a brayer, it gets messy.)
I trimmed the excess tissue. (I have torn it before, too, for a different effect.)
After the glue dried, I took the card outside to spray it with some glitter spray.
Here's the before during and after, side by side. (The last one is from the sample and it has some silver Scribbles paint along the edge.)
What do the final cards look like? Well that's a secret for now, but I will show you when the swap is done!
If you try altering your backgrounds with tissue let me see.
Now I am working on some ATCs. I have done some before using the same cardstock I am using this time. However, I am tired of this background and want to alter it some how, so here's where the process went.
(Note: I did try it on some sample-sized pieces of cardstock first so you might see those pop in from shot to shot.)
I began with a plain piece of cardstock (it is supposed to be green/yellow.)
I lightly drew a line on the card.

I then squeezed some glue onto the card (don't ask why it's blue...that's another story.)
 I used scrap piece of stock to spread the glue to get a perfectly straight edge.
 I laid the tissue paper onto the wet glue and pressed out the bubbles. (You could use a brayer, it gets messy.)
I trimmed the excess tissue. (I have torn it before, too, for a different effect.)
After the glue dried, I took the card outside to spray it with some glitter spray.
Here's the before during and after, side by side. (The last one is from the sample and it has some silver Scribbles paint along the edge.)
What do the final cards look like? Well that's a secret for now, but I will show you when the swap is done!
If you try altering your backgrounds with tissue let me see.


Comments
Love the step by step instructions here.
Of course I WON'T be giving it a go.....not enough time in the day...or night!!
Take care mate.
Peg
Roban
Thanks girl:)
xxxx
Chimene